“It is only with the DAIS that one can see rightly; what is essential is invisible to the eye” – A respectful look at a great Canadian aerospace invention, the Diffracto DAIS non destructive testing equipment, and a bit more, part 1
Greetings, my faithful reading friend, and welcome once again to the wonderful world of science and technology.
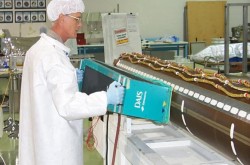
This time around, yours truly would like to look at a few of the countless items which can be found in the collection of the incomparable Canada Aviation and Space Museum, in Ottawa, Ontario. The items in question are two DAIS inspection heads, their computer and the components needed to operate them. The museum acquired them in June 2014, in other words 10 years ago.
And yes, I took the liberty of paraphrasing a sentence from one of the most popular books ever published, Count Antoine Marie Jean-Baptiste Roger de Saint-Exupéry’s 1943 novella The Little Prince, as I wrote the title of this article, but back to our story.
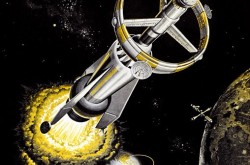
Let us begin this issue of our amaaazing blog / bulletin / thingee with a sweeping statement: the Canadian technology at the heart of said issue, namely the Diffracto D-sight Aircraft Inspection System (DAIS), a non destructive testing equipment, is a spinoff from the Space Transportation System, a National Aeronautics and Space Administration (NASA) system known around the globe for its Space Shuttles.
Need yours truly need to remind you that NASA was mentioned in a great many issues of that same blog / bulletin / thingee, and this since March 2018? I thought not. Let us begin our journey down memory lane.
Our fascinating story began in the early 1980s. Even though it was a small firm, Diffracto Limited of Windsor, Ontario, was a major player in the design and production of vision systems used for robot guidance, inspections and measurements.
The story of Diffracto had begun at the University of Windsor in… Windsor, Ontario, with 5 talented doctoral engineering students and their equally talented professor, Walter P.T. North. One of those students was an American named Timothy R. “Tim” Pryor who became the founding head of the firm. Funding originally came from a provincial agency, Ontario Development Corporation of Toronto, Ontario.
Diffracto was set up in Windsor in 1973 to develop some sort of laser beam technology able to measure and check machinery parts, but back to the early 1980s.
Back then, NASA was intrigued by the idea of developing a computerised video camera system which would facilitate the work of astronauts trying to grab objects in space using the Shuttle Remote Manipulator System, a robotic arm famously known later on as the Canadarm.
A brief digression if I may. The first Canadarm has been on display at the Canada Aviation and Space Museum since May 2013. That Canadian engineering icon is on permanent loan to that institution, courtesy of NASA and the Canadian Space Agency (CSA). End of digression.
The aforementioned computerised video camera system was jointly developed by the National Research Council of Canada (NRC) and the firm which had supervised the development of the Canadarm, Spar Aerospace Limited of Weston, Ontario. A prototype of that system, the Space Vision System (SVS), was more or less ready when the Space Shuttle Challenger was lost in January 1986.
The Challenger disaster resulted in a massive investigation. All surviving shuttles were grounded until September 1988. That delay in operations, as serious as it was, allowed the CSA, NRC and SPAR Aerospace to develop the prototype of an Advanced Space Vision System (ASVS). Neptec Design Group Incorporated of Ottawa played a significant role in this work later on.
The new vision system was intended to improve the ability of astronauts to see what was going on outside a Space Shuttle or the International Space Station (ISS).
And yes, you are correct, my reading friend, NRC has also been mentioned a great many times in our you know what, and this since March 2018. And you are the one which is digressing.
The SVS went into space in October 1992, aboard a Space Shuttle, Columbia. That crew included Ottawa-born astronaut Steven Glenwood MacLean as the payload specialist. MacLean, who went on to become president of the CSA, in September 2008, was the program manager for the ASVS between 1987 and 1993.
The ASVS was tested in space in November 1995, aboard a Space Shuttle, Atlantis. That crew also included a Canadian astronaut, mission specialist Chris Austin Hadfield.
In late 1998, the ASVS helped put together the first elements of the ISS.
Would you believe that a prototype of the ASVS can be found in the collection of the stupendous Canada Aviation and Space Museum? But back to the device at the heart of this issue of our blog / bulletin / thingee.
Besides the ASVS, the aforementioned SVS inspired the development of commercial / industrial versions. Diffracto was granted a licence to perform that work. As they experimented with their systems, its engineers were intrigued by the way light reflected off the objects which were to be manipulated by the Canadarm.
Diffracto’s engineers looked at the basic idea behind the DAIS, the so-called Diffracto-sight or D-sight effect, in 1983, at the request of NRC. Supported by that world famous organisation through its Pilot Industry / Laboratory Program and its Industrial Research Assistance Program, the firm developed the D-sight concept and may have put together the first testing units as early as 1984-85. Those devices were able to detect very small (0.025 mm / 0.01 inch?) defects.
Before I forget, D-sight used the light reflected twice from the flat or moderately curved surface of a material, component or structure in order to see small surface distortions or deformations. Such defects could indicate the presence of internal problems.
Diffracto patented its D-sight system in 1986.
The first application of this technology took place in automobile factories where a number of more or less enclosed quality control workstations were installed to inspect raw sheet metal body stampings, external body panels, painted car bodies, etc.
General Motors Corporation began to use the workstations developed by Diffracto no later than 1985-86, to evaluate body parts for certain types of vehicles made in the Oshawa, Ontario, plant operated by its Canadian subsidiary, General Motors of Canada Limited. Similar workstations were presumably put in place in at least one American factory of that automobile giant.
You see, the General Motors Technical Center and the small Ontario firm had in fact been working together since 1977. If truth be told, American automobile giant acquired a minority interest in Diffracto in 1984.
Ford Motor Company began to use Diffracto’s workstations in the 1980s. Chrysler Corporation did so no later than 1988.
And yes, those firms have been mentioned many times in our you know what since January 2018, February 2019, October 2018 and January 2019, but I digress.

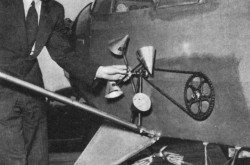
Examining the fender of an automobile using a Diffracto D-sight quality control workstation. James J. Haggerty, ed. Spinoff 1988 (Washington: U.S. Government Printing Office, 1988), 129.
Diffracto claimed that the systems used by the automobile makers could detect up to 94 % of the defects present on stamped metal sheets, which was significantly better than what conventional methods could achieve, that is 50 %.
Mind you, Diffracto also exported some of its wares to Europe and Asia, in Japan for example. Its distributor in Europe was a West German firm, Hommelwerke Gesellschaft mit beschränkter Haftung, a subsidiary of a West German steelmaking firm. Interestingly enough, that firm, Otto Wolff Aktiengesellschaft, had acquired a minority interest in Diffract in the early 1980s, at a time when the small Canadian firm was on the verge of collapse.
By the mid-1980s, however, Diffracto was deemed to be one of the North American leader in the field of vision robotics systems. It even had an American subsidiary through which it conducted most of its business in the United States.
In 1990, however, Diffracto sold to its major competitor, an American firm by the name of Perceptron Incorporated, the technology it had developed to help automobile manufacturers fit parts together. Given a likely reduction is sales in months and years to come, Diffracto’s management decided to pull out of that field while the going was good.
Diffracto’s management decided to put all its eggs in one basket, namely D-sight. A new stage in the history of the firm was beginning.
Mind you, Diffracto also developed a most interesting machine in the mid to late 1980s, the Programmable Airfoil Contouring System (PACS), the world’s 1st automated jet engine blade testing and repair system.
As you know, jet engines contain hundreds of blades, mounted in rows in its compressor and turbine. Testing them by hand was a long a tedious process. Several American engine manufacturers turned to the PACS to do the work faster and with more accuracy.
Mind you, again, jet engine blades can also wear out or be damaged. Once repaired, by welding for example, they need to be ground back to their original shape. Before the development of the PACS, this work had been done by hand by trained technicians. The new device did that work faster and with more accuracy. The United States Navy was the first organisation to use the PACS for repair purposes, in 1993, but I digress.
Having heard of the work done by D-sight devices in the automotive industry, some engineers working at NRC’s National Aeronautical Establishment (NAE), an organisation known from 1990 onward as the Institute for Aerospace Research (IAR), wondered if D-sight could be of use in the aerospace industry.
One of those people was a Polish Canadian engineer by the name of Jerzy P. Komorowski, the future Director General of IAR (2005-17).
Incidentally, the NAE and IAR were mentioned in a December 2022 issue of our blog / bulletin / thingee. The former was also mentioned in a February 2024 issue of that same awe-inspiring publication while the latter was so blessed in July 2018.
And yes, my reading friend, you are quite correct, the aforementioned Pryor had left Diffracto in 1988 to head a firm whose goal was to develop machine vision sensing devices for markets other than the automotive and aerospace industries. Sensor Adaptive Machines Incorporated of Windsor was jointly owned by Pryor (60 %) and Diffracto, but back to our story.
After contacting Diffracto in 1987, the NAE conducted experiments between 1988 and 1991. The first trials used so-called open systems. In other words, the material, component or structure in need of testing was positioned near a tripod-mounted light source with a special screen hanging from a stand. Even though the D-sight effect could be visualised directly, a camera could also be used to record the image reflected from the screen directly on the surface of the examined object.
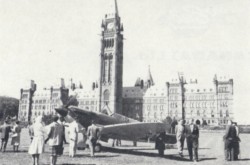
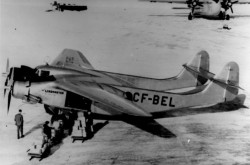
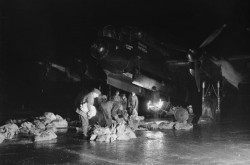
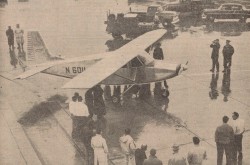
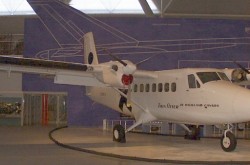
Realising the need to limit or exclude ambient light, NAE conducted the first aerospace-related D-sight testing trial at night, in 1994 perhaps, just outside the main building of what was then the National Aviation Museum, today’s Canada Aviation and Space Museum, on the prototype of the de Havilland Canada Dash 7 short takeoff and landing airliner delivered to that national museum in October 1988.

The fuselage buckling discovered during the first aerospace-related D-sight testing trial, held at night, just outside the main building of was then the National Aviation Museum, on the prototype of the de Havilland Canada Dash 7 short takeoff and landing airliner, Ottawa, Ontario, circa 1994. National Research Council Canada.
The fuselage surfaces chosen for examination were covered with a highlighter fluid, kerosene in this particular case, to increase their reflectivity and remove any dirt particles. This kerosene was applied manually, with a squeegee. Given the fact that kerosene is a flammable liquid, the inspection team needed to exercise caution at all times.
Interestingly, that inspection recorded fuselage buckling resulting from a hard landing that was invisible to the naked eye.
The second trial took place in 1994 at a Canadair Incorporated facility constructed in Mirabel, Québec, to perform maintenance work on the fleet of McDonnell Douglas CF-188 supersonic fighters of the Canadian Forces’ Air Command. The surfaces tested were the wings and tail of one of those aircraft.
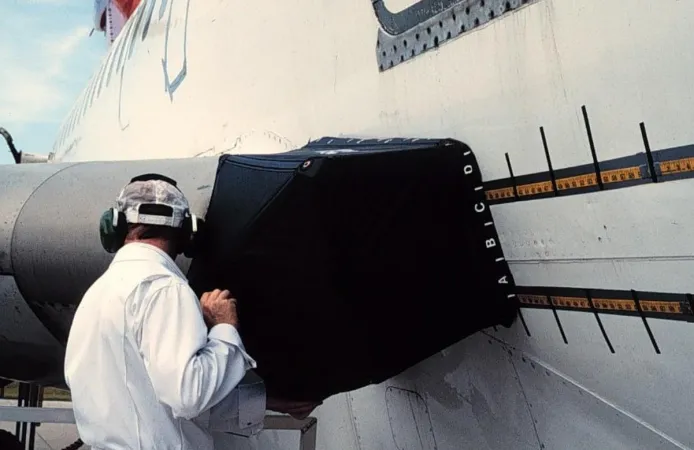
To control the light coming from windows and overhead fixtures, a tent had to be erected prior to the examination of the upper surface of the wings. That issue led to the development of an enclosed inspection head optimised for inspecting carbon fibre-reinforced polymer (CFRP) surfaces. That DAIS-1000 was originally envisaged to fulfill the large area and rapid scanning requirement of the Canadian Forces.
In turn, the space between the under wing pylons used to transport fuel tanks or weapons, bombs or missiles for example, led to the design, around 1991, of an inspection head, the DAIS-500, with a viewing area half the size of the DAIS-1000 inspection head.
Would you believe that, in effort to keep the weight of the inspection head as low as possible, the staff at IAR used some of the first graphite composite rods put on the market to hold together the sheet metal bodies of said heads?
Incidentally, the DAIS-500 could be attached to an expandable pole, which allowed an operator to conduct inspections in otherwise out of reach sections of an aircraft.
The trial conducted at Mirabel detected impact damage sites and highlighted the need to control the application of the highlighter fluid to reduce the interference caused by the relative roughness of CFRP surfaces while maintaining sensitivity to the presence of barely visible impact damage.
It should of course be noted that the world class collection of the Canada Aviation and Space Museum includes a CF-188.
It might also be worth noting that the process which had led to the awarding of the maintenance contract to Canadair of Cartierville / Montréal, Québec, had been somewhat controversial.
As was to be expected, the Department of National Defence initiated a competition to select the group of Canadian companies which would provide technical support to the sophisticated systems of the CF-188 it had decided to order, in April 1980.
After some time, only two groups respectively led by Canadair and Bristol Aerospace Limited, a subsidiary of Rolls-Royce Limited based in Winnipeg, Manitoba, remained in the race. The Department of National Defence seemed to favour the latter’s offer for its lower cost and higher technical aspects. That information might, I repeat might, have been shared with Bristol Aerospace’s management.
The announcement of the victory of the group led by Canadair in the fall of 1986 therefore came as a bombshell.
Many newspapers and magazines denounced the federal government’s decision. The reaction from the media in western Canada was particularly strong. The government had broken its word and favoured one region of Canada, Québec, over another.
Why had it done so, you ask, my reading friend? Well, the government led by Martin Brian Mulroney might have awarded Canadair that very lucrative contract to ensure the financial stability of that aircraft manufacturing firm for many years. This being said (typed?), it might also have wanted to preserve its electoral base in Québec. In any event the decision was to some extent based on the absence of a Canadian industrial policy on aeronautics / aerospace.
As you undoubtedly know, Mulroney did preserve his electoral base in Québec in the November 1988 federal election. That same base was not so well preserved in Western Canada.
Incidentally, Mulroney was mentioned in January and October 2021 issues of our blog / bulletin / thingee.
And yes, one could argue that, without the controversial decision made by the Mulroney government, Canadair would have been in no position to develop the world famous, if not downright revolutionary Bombardier CRJ regional jet, an airliner which made its first flight in May 1991.
Even though kerosene proved to be a very effective highlighter fluid, NAE switched relatively early on to a non-flammable degreasing product which evaporated quickly and left no residue. Mind you, that product was still applied manually, with a squeegee.
By and large, D-sight testing was done by teams of two people. One of the team members used the squeegee to apply the degreasing product over an area 2 to 2.5 m (6.5 to 8.25 feet) long, which allowed the other team member to place the inspection head 4 or 5 times on a fuselage or wing while his colleague handled the data acquisition.
The degreasing product was always applied along the line the operator would follow when conducting the inspection (left to right or bottom to top). Applying it at a right angle to the direction of inspection introduced a great deal of interference.
Protruding rivet heads were another source of interference. The degreasing product collected on them before drooling downward. As a result, the squeegee person had to use the squeegee between positionings to wipe smooth each of the areas on which the other team member would place the inspection head.
The host computer was always left on the ground. A cable linked it to the inspection head. Team members were thus able to stand on a wing or elevated platform while the host computer was positioned safely out of the way.
This was the method used in 1997, I think, to inspect the fuselage of two Canadair / Bombardier CC-144 Challenger VIP transport planes flown by the Canadian Forces’ Air Command. And yes, the collection of the Canada Aviation and Space Museum includes a Challenger.
Ending this first part of our examination of the history of the DAIS by mentioning the awesome collection of the Canada Aviation and Space Museum was not something yours truly had planned on, but it works for me. See you very soon.




![A block of photographs showing some of the people involved in the bombing of beluga whales in the estuary and gulf of the St. Lawrence River. Anon., “La chasse aux marsouins [sic]. » Le Devoir, 15 August 1929, 6.](/sites/default/files/styles/thumbnail_7/public/2024-09/Le%20Devoir%2015%20aout%201929%20page%206.jpg?h=584f1d27&itok=TppdLItg)





























![Peter Müller at the controls [sic] of the Pedroplan, Berlin, Germany, March 1931. Anon., “Cologne contre Marseille – Le mystère du ‘Pédroplan.’ [sic]” Les Ailes, 2 April 1931, 14.](/sites/default/files/styles/thumbnail_7/public/2021-04/Les%20Ailes%202%20avril%201931%20version%20big.jpg?h=eafd0ed4&itok=WnBZ5gMf)
![One of the first de Havilland Canada Chipmunk imported to the United Kingdom. Anon., “De Havilland [Canada] DHC-1 ‘Chipmunk.’” Aviation Magazine, 1 January 1951, cover.](/sites/default/files/styles/thumbnail_7/public/2021-01/Aviation%20magazine%201er%20janvier%201951%20version%202.jpg?h=2f876e0f&itok=DM4JHe5C)
