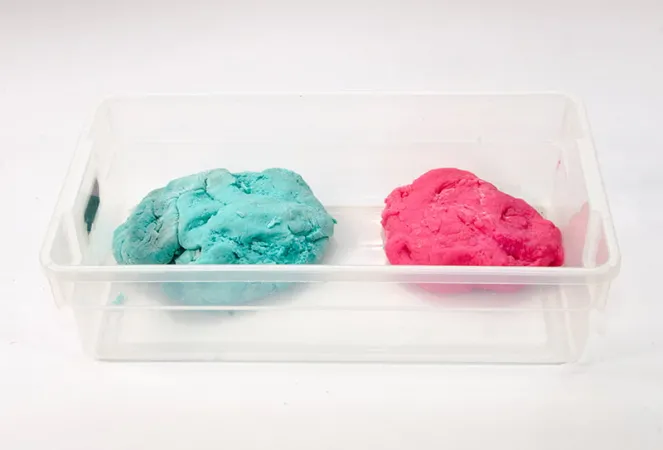
Experiment with safe and easy electrical circuits you make yourself! Use everyday kitchen ingredients to cook up some homemade dough that you can mould to serve as two types of wires in a circuit.
What you need
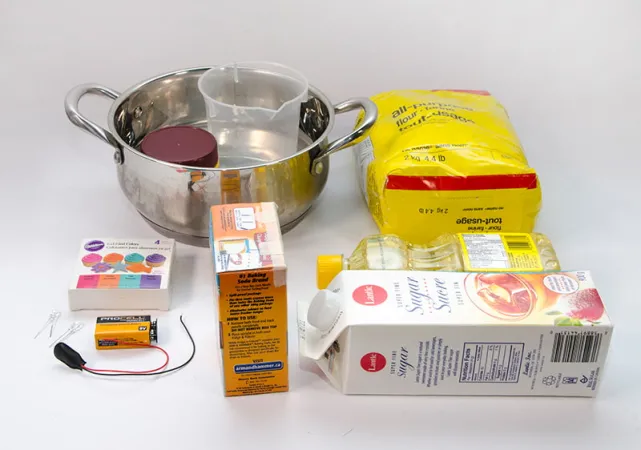
Hardware materials
- 9V battery
- 9V battery holder with wire leads
- One 3V mini LED bulb (available at electronic supply shops or online)
- Saucepan
- Bowl
- Stovetop
- Cookie cutters (optional)
Conductive dough ingredients
- 250 ml flour
- 60 ml salt
- 5 ml vegetable oil
- 25 ml baking powder
- 250 ml water
- food colouring
Insulating dough ingredients
- 250 ml flour
- 125 ml sugar
- 15 ml vegetable oil
- 125 ml water
- different colours of food colouring
Safety first!
Never connect a battery directly to itself — this can cause it to short circuit and heat up. Do not attach the LED directly to the battery as it may burst.
Make it
Making conductive dough
- Mix the flour, salt, and baking powder together in the saucepan.
- Slowly mix in the water, vegetable oil, and food colouring.
- With the help of an adult, bring the mixture to a boil over medium heat, stirring constantly.
- When the mixture begins to form a ball, remove it from the heat and place it on a lightly floured surface. Let it cool for a few minutes before touching it.
- Once cooled, knead the dough with your hands. If it is too soft, add more flour; if it is too hard, add more water.
- You can keep your dough for up to two weeks in a plastic bag — be sure to label it as conductive.
Making insulating dough
- Mix the flour, sugar, food colouring, and vegetable oil together in a bowl.
- Slowly stir the water into the mixture.
- Transfer the lumpy mixture onto a floured surface and knead the dough with your hands, adding the remaining flour until the dough reaches an elastic consistency.
- You can keep your dough for up to two weeks in a plastic bag — be sure to label it as insulating.
Test it
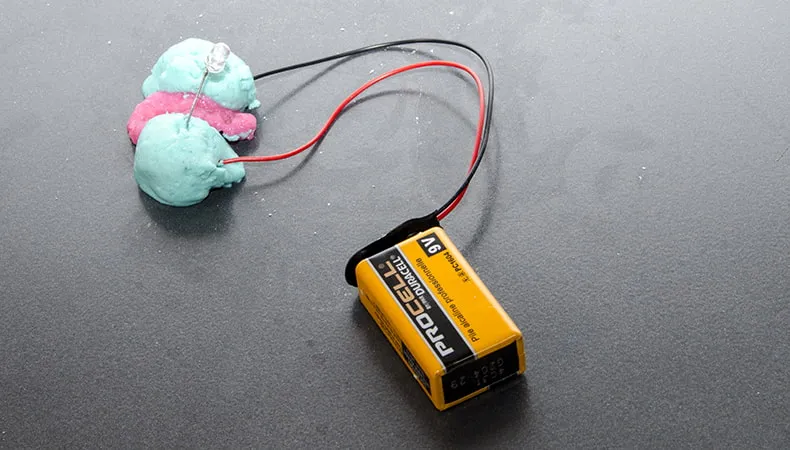
The first conductive dough will allow electricity to pass through it, and the second insulating dough will stop electricity in its path. Using the two together, you’ll create a circuit to power an LED (light-emitting diode) light.
Now, with the combination of both conductive and insulating doughs, you can let your imagination run wild as you design your own circuits. Braid your dough into a woven circuit jumble, or use cookie cutters to make beautifully shaped circuits, or add many LEDs along the circuit. Make sure to leave a place for the battery and the LED.
Attach both leads (the prongs at the bottom) of the battery and the LEDs to your circuit.
Note: make sure to never directly connect the LED to the battery!
Explain it
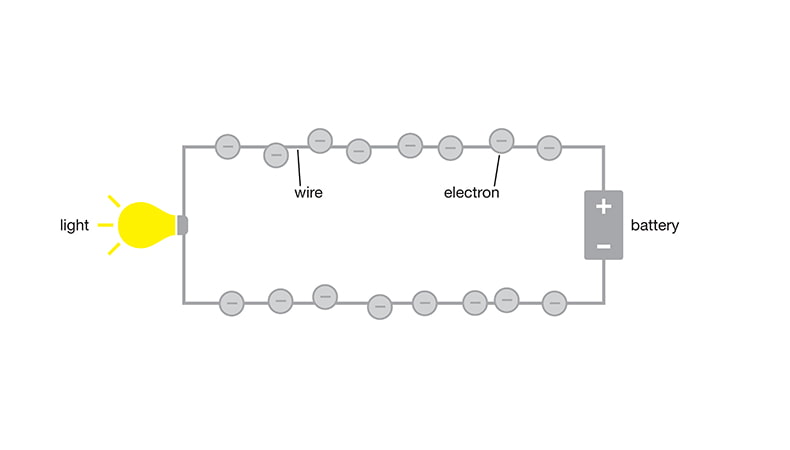
Electricity is produced by the movement of tiny negatively charged particles called electrons. Flowing electrons produce what we call a current through a conductive material such as electrical wires or our conductive dough. The electron current can only travel if it can complete a loop or circuit back to the battery, as in the diagram below. Electrons can only flow through the conductive dough, not the insulating dough.
Observe it
Often, the Christmas lights that many put up on their houses around the holidays won’t work if one of the lightbulbs breaks. Can you guess why? It’s the same reason that your squishy circuit won’t work if you don’t have a full loop — the electrons can’t flow back to the energy source!
Go further
Try placing each of the two leads (the prongs sticking out of the bottom on the LED) in separate pieces of conductive dough, which are both attached to one lead of your battery. Move the pieces of dough together so that they are touching. Why doesn’t the LED light up? The answer is because the current, or flow of electricity likes to take the path of least resistance. It is easier for it to flow back entirely through the conductive dough than the LED, so if it can, it will bypass the LED entirely.
Program Details
- View all programs at the Canada Science and Technology Museum
- View other programs related to Energy

